微服务的各个组件和常见实现:
注册中心:用于服务的注册与发现,管理微服务的地址信息。常见的实现包括:
Spring Cloud Netflix:Eureka、Consul Spring Cloud Alibaba:Nacos
配置中心:用于集中管理微服务的配置信息,可以动态修改配置而不需要重启服务。常见的实现包括:
Spring Cloud Netflix:Spring Cloud Config Spring Cloud Alibaba:Nacos Config
远程调用:用于在不同的微服务之间进行通信和协作。常见的实现包括:
RESTful API:如RestTemplate、Feign RPC(远程过程调用):如Dubbo、gRPC
API网关:作为微服务架构的入口,统一暴露服务,并提供路由、负载均衡、安全认证等功能。常见的实现包括:
Spring Cloud Netflix:Zuul Spring Cloud Alibaba:Gateway、Apisix等
分布式事务:保证跨多个微服务调用的事务一致性。常见的实现包括:
Spring Cloud Alibaba:Seata
熔断器:用于防止微服务之间的故障扩散,提高系统的容错能力。常见的实现包括:
Spring Cloud Netflix:Hystrix Spring Cloud Alibaba:Sentinel、Resilience4j
限流和降级:用于防止微服务过载,对请求进行限制和降级处理。常见的实现包括:
Spring Cloud Netflix:Hystrix Spring Cloud Alibaba:Sentinel
分布式追踪和监控:用于跟踪和监控微服务的请求流程和性能指标。常见的实现包括:
Spring Cloud Netflix:Spring Cloud Sleuth + Zipkin Spring Cloud Alibaba:SkyWalking、Sentinel Dashboard
1. RUNNING
Accept new tasks and process queued tasks
表示线程池正常运行,既能接受新任务,也会正常处理队列中的任务
2. SHUTDOWN
Don't accept new tasks, but process queued tasks
当调用线程池的shutdown()方法时,线程池就进入SHUTDOWN状态,表示线程池处于正在关闭状态,此状态下线程池不会接受新任务,但是会继续把队列中的任务处理完
3. STOP
Don't accept new tasks, don't process queued tasks, and interrupt in-progress tasks
当调用线程池的shutdownnow()方法时,线程池就进入STOP状态,表示线程池处于正在停止状态,此状态下线程池既不会接受新任务了,也不会处理队列中的任务,并且正在运行的线程也会被中断
4. TIDYING
All tasks have terminated, workerCount is zero, the thread transitioning to state TIDYING will run the terminated() hook method
线程池中没有线程在运行后,线程池的状态就会自动变为TIDYING,并且会调用terminated(),该方法是空方法,留给程序员进行扩展。
5. TERMINATED
terminated() has completed
terminated()方法执行完之后,线程池状态就会变为TERMINATED
# 查看堆内存各区域的使用率以及GC情况
jstat -gcutil -h20 pid 1000
# 查看堆内存中的存活对象,并按空间排序
jmap -histo pid | head -n20
# dump堆内存文件
jmap -dump:format=b,file=heap pid
使用 jps 查看运行的 Java 进程 ID 使用top -p [pid] 查看进程使用 CPU 和 MEM 的情况 使用 top -Hp [pid] 查看进程下的所有线程占 CPU 和 MEM 的情况
使用 jps 查看运行的 Java 进程 ID
①先创建两个EventLoopGroup事件组,然后创建一个ServerBootstrap服务端。 ②将创建的两个事件组boss、worker绑定在服务端上,并指定服务端通道为NIO类型。 ③在server上添加处理器,对新到来的Socket连接进行处理,在这里主要分为两类: ChannelInitializer:连接到来时执行,主要是用于添加更多的处理器(只触发一次)。 addLast():通过该方式添加的处理器不会立马执行,而是根据处理器类型择机执行。 ④为创建好的服务端绑定IP及端口号,调用sync()意思是阻塞至绑定成功为止。 ⑤再创建一个EventLoopGroup事件组,并创建一个Bootstrap客户端。 ⑥将事件组绑定在客户端上,由于无需处理连接事件,所以只需要一个事件组。 ⑦指定Channel通道类型为NIO、添加处理器.....(同服务端类似) ⑧与前面服务端绑定的地址建立连接,由于默认是异步的,也要调用sync()阻塞。 ⑨建立连接后,客户端将数据写入到通道准备发送,首先会先经过添加好的编码处理器,将数据的格式设为UTF-8。 ⑩服务器收到数据后,会先经过解码处理器,然后再去到入站处理,执行对应的Read()方法逻辑。 ⑪客户端完成数据发送后,先关闭通道,再优雅关闭创建好的事件组。 ⑫同理,服务端工作完成后,先关闭通道再停止事件组。
spring:
  shardingsphere:
    datasource:
      names: ds0, ds1
      ds0:
        type: com.alibaba.druid.pool.DruidDataSource
        driver-class-name: com.mysql.cj.jdbc.Driver
        url: jdbc:mysql://localhost:3306/ds0
        username: root
        password: 123456
      ds1:
        type: com.alibaba.druid.pool.DruidDataSource
        driver-class-name: com.mysql.cj.jdbc.Driver
        url: jdbc:mysql://localhost:3306/ds1
        username: root
        password: 123456

    sharding:
      tables:
        user:
          actual-data-nodes: ds$->{0..1}.user$->{0..1}
          table-strategy:
            inline:
              sharding-column: id
              algorithm-expression: user$->{id % 2}
          key-generator:
            column: id
            type: SNOWFLAKE
      binding-tables: user
      broadcast-tables:
      default-database-strategy:
        inline:
          sharding-column: age
          algorithm-expression: ds$->{age % 2}

    props:
        sql:
          show: true
mybatis-plus:
  configuration:
    log-impl: org.apache.ibatis.logging.stdout.StdOutImpl
配置项 | 规格 |
| ----- | ------------ |
| CPU内存 | 1w台设备以内2核4G |
| 硬盘 | 每100台设备1年20G |
| 操作系统 | Linux
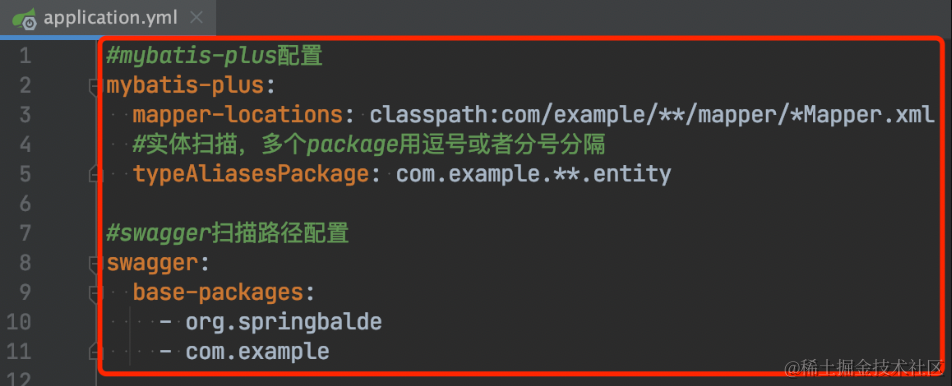
不同包名如何配置mybatis、feign、bean
mvn clean install生效
docker ps redis prom/prometheus:latest nacos/nacos-server:latest nacos/nacos-mysql-slave:latest nacos/nacos-mysql-master:latest grafana/grafana:latest
补充一点,可以在不需要默认序列化的字段加上如下注解:
@JsonSerialize(nullsUsing = NullSerializer.class)
ShardingSphere读写分离
spring: shardingsphere: datasource: names: master,slave0 slave0: password: root type: com.alibaba.druid.pool.DruidDataSource driver-class-name: com.mysql.cj.jdbc.Driver url: jdbc:mysql://111.222.333.444:3306/xxx?useUnicode=true&characterEncoding=UTF-8&zeroDateTimeBehavior=convertToNull&allowMultiQueries=true&useSSL=false&serverTimezone=GMT%2B8 username: admin master: password: root type: com.alibaba.druid.pool.DruidDataSource driver-class-name: com.mysql.cj.jdbc.Driver url: jdbc:mysql://555.666.777.888:3306/xxx?useUnicode=true&characterEncoding=UTF-8&zeroDateTimeBehavior=convertToNull&allowMultiQueries=true&useSSL=false&serverTimezone=GMT%2B8 username: root masterslave: slave-data-source-names: slave0 name: ms master-data-source-name: master props: sql: show: true
spring: shardingsphere: datasource: names: master,slave0 slave0: password: root type: com.alibaba.druid.pool.DruidDataSource driver-class-name: com.mysql.cj.jdbc.Driver url: jdbc:mysql://111.222.333.444:3306/xxx?useUnicode=true&characterEncoding=UTF-8&zeroDateTimeBehavior=convertToNull&allowMultiQueries=true&useSSL=false&serverTimezone=GMT%2B8 username: admin master: password: root type: com.alibaba.druid.pool.DruidDataSource driver-class-name: com.mysql.cj.jdbc.Driver url: jdbc:mysql://555.666.777.888:3306/xxx?useUnicode=true&characterEncoding=UTF-8&zeroDateTimeBehavior=convertToNull&allowMultiQueries=true&useSSL=false&serverTimezone=GMT%2B8 username: root masterslave: slave-data-source-names: slave0 name: ms master-data-source-name: master props: sql: show: true
java -Dfile.encoding=UTF-8 -jar api.jar
加上 -Dfile.encoding=UTF-8 即可
全局替换
@PreAuth(RoleConstant.HAS_ROLE_ADMIN
为
//@PreAuth(RoleConstant.HAS_ROLE_ADMIN
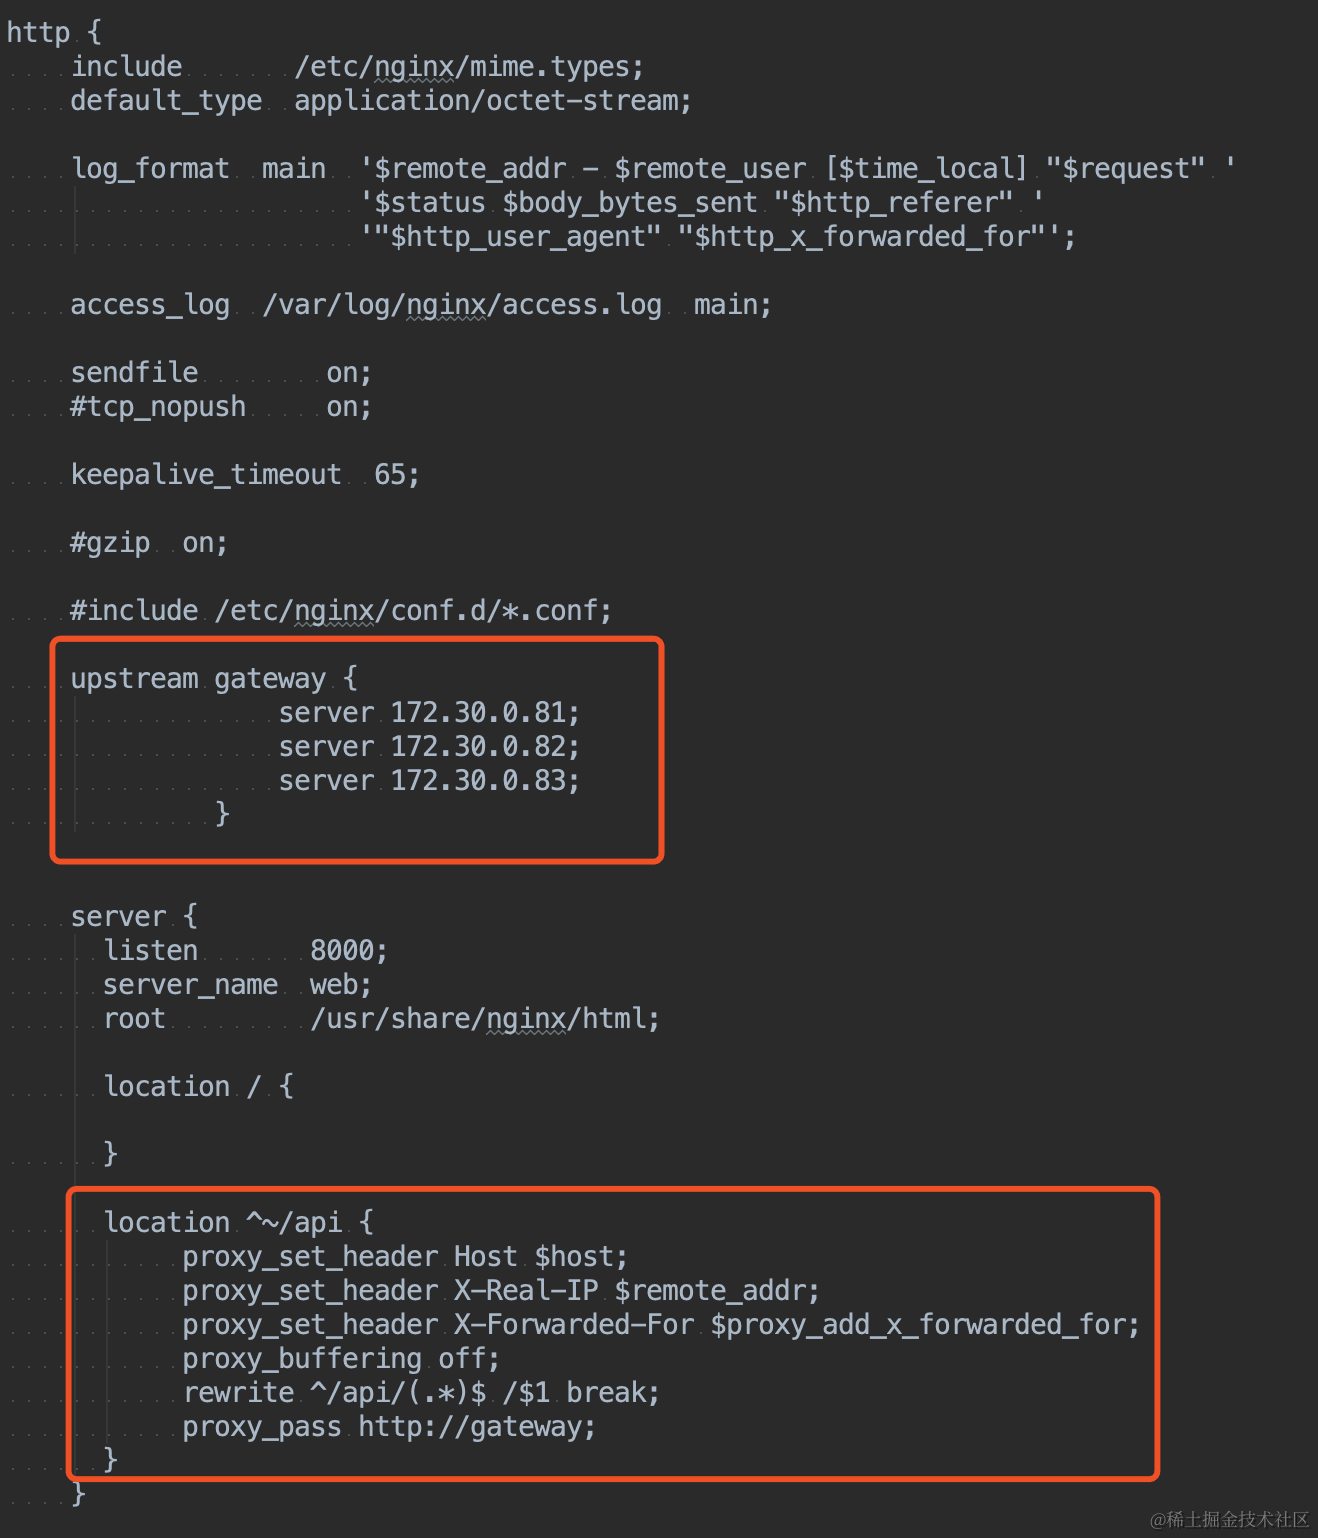
不需要开放所有端口,只需要开放网关端口就行
如果没用k8s、dockerswarm部署,又分开在各个服务器,那么需要注册外网ip,并且开放端口,这样Gateway才能取到对应服务的外网ip并调用
程序运行逻辑如下:
1. 访问网关+服务名路由地址
css 一般会和 js 打包到一起,如果希望单独打包并进行 [hash] 可以使用 ExtractTextPlugin 精选提取
npm install –save-dev extract-text-webpack-plugin@next
const ExtractTextPlugin = require('extract-text-webpack-plugin') configureWebpack: config => { config.module.rules.push({ test: /.less$/i, use: ExtractTextPlugin.extract(['css-loader', 'less-loader']) }) config.plugins.push( new ExtractTextPlugin({ filename: `css/[name].{Timestamp}.css`, allChunks: true }) ) }
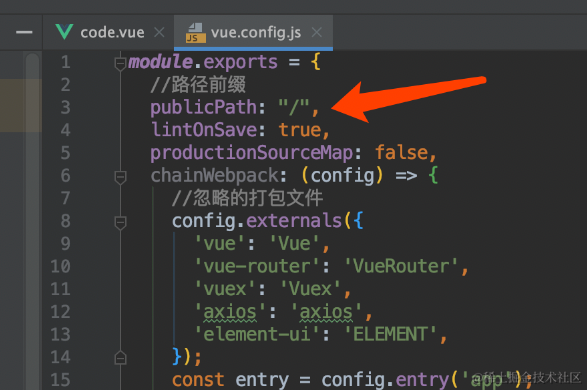
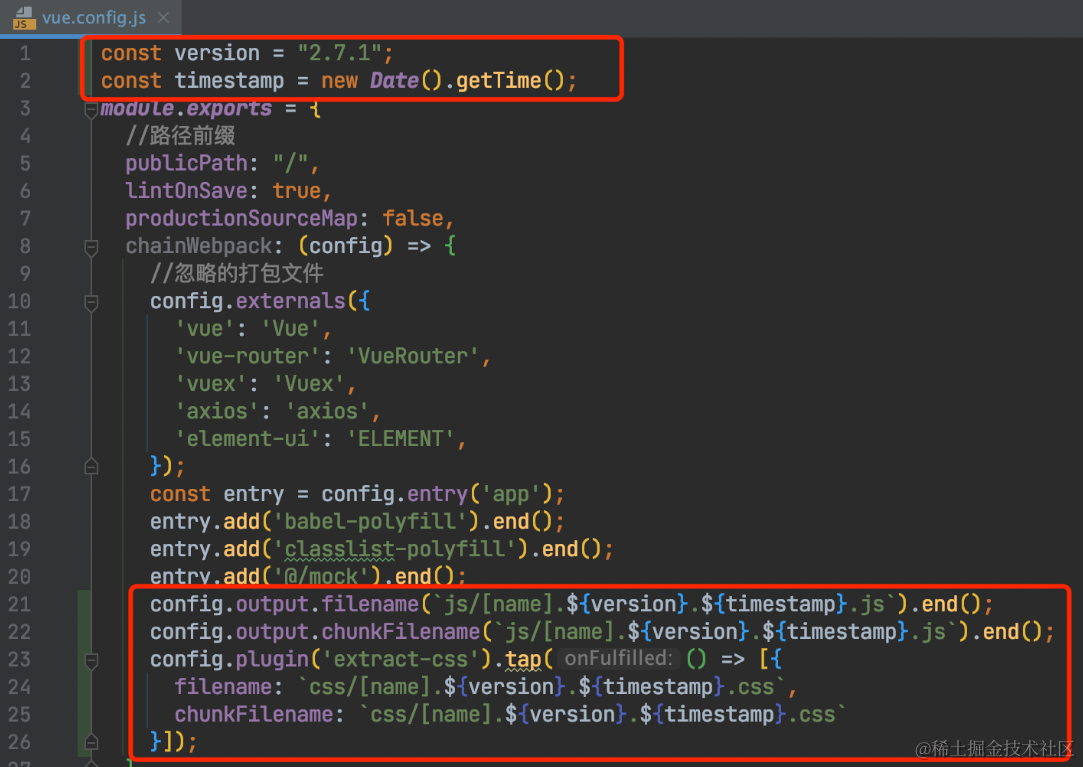
`vue-cli 3` 在 `vue.config.js` 加入如下配置:
{
configureWebpack: config => {
// 输出文件名 hash,杜绝版本更新后浏览器不刷新
config.output.filename = [name].${VERSION}.${Timestamp}.jsconfig.output.chunkFilename = [name].${VERSION}.${Timestamp}.js......
}
}
因为 `js/css` 的文件名都没变化,导致浏览器仍然会读取 `js/css` 的缓存,因此我们需要给打包输出的文件名给予 `hash` 处理,使其每次打包输出的文件名都不同,这样浏览器就不会读取旧有的缓存文件了。

表明 `html/htm` 文件不再使用缓存,`js/css` 等文件的缓存有 7 天有效期。
location /gzip_static on; root /usr/share/nginx/html; index index.html index.htm; try_files uri/ /index.html; if ($request_filename ~* .*.(?:htmif ()expires 7d; } if ($request_filename ~* .*.(?:jpg}
vue-cli 3 使用 webpack 输出 js css 文件 hash 解决缓存问题
该解决方案针对 `Vue` 等 `hash` 打包静态资源,且 `nginx` 部署的项目。
这样的项目一般来讲打包后生成的 `hash` 已经帮我们解决了 `js/css` 的问题。
但 `html` 资源始终是 那个 `index.html`,我们浏览器刷新再刷新始终是 304 [状态码]
在nginx和document.ejs设置不缓存index.html,和serviceWorker.js(这个是一种叫pwa的技术,导致了页面一直有离线缓存)。不缓存index.html是因为umi打版本号只是打给了js和css,而页面进入读取的还是同一份index.html,他没有版本号,而css和js是通过index.html里面读取其版本号出来,然后进行加载的。
配置文件里设置hash:true
这样就会打上JS版本号,CSS版本号。
- Secure 框架进行了两层 API 鉴权。
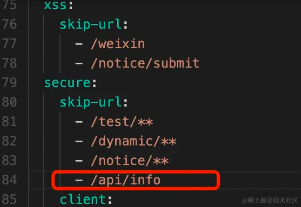
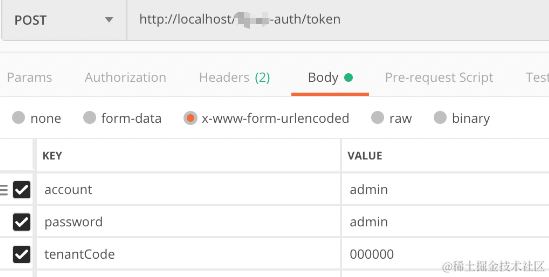
- 第一层校验请求携带的Token是否合法,不需要Token校验的可通过配置放行。
- 第二层校验`@PreAuth`配置的逻辑是否符合,若不符合也返回`请求未授权`。
Seata 是一款开源的分布式事务解决方案,致力于提供高性能和简单易用的分布式事务服务。Seata 将为用户提供了 AT、TCC、SAGA 和 XA 事务模式,为用户打造一站式的分布式解决方案。
理论上,所有可以输入的地方没有对输入数据进行处理的话,都会存在XSS漏洞。漏洞的厉害取决于攻击代码的能力。
gd.yaml
gd-dev.yaml
gateway为API网关,所有请求的闸口,只需在gateway这一层设置允许跨域即可
public static Claims parseJWT(String jsonWebToken) { try { return Jwts.parserBuilder() .setSigningKey(Base64.getDecoder().decode(getBase64Security())).build() .parseClaimsJws(jsonWebToken).getBody(); } catch (Exception ex) { return null; } }
为什么要从第七位取字符串,因为BEARER格式的认证串为:bearer[空格]认证字符
public static String getToken(String auth) { if ((auth != null) & (auth.length() > AUTH_LENGTH)){ String headStr = auth.substring(0, 6).toLowerCase(); if (headStr.compareTo(BEARE) == 0) { auth = auth.substring(7); } return auth; } return null; }
public static String AUTH_KEY = TokenConstant.HEADER;
private static final List
String headerToken = exchange.getRequest().getHeaders().getFirst(AuthProvider.AUTH_KEY); String paramToken = exchange.getRequest().getQueryParams().getFirst(AuthProvider.AUTH_KEY); if (StringUtils.isBlank(headerToken) && StringUtils.isBlank(paramToken)) { return unAuth(resp, "缺失令牌,鉴权失败"); }
private boolean isSkip(String path)return AuthProvider.getDefaultSkipUrl().stream().anyMatch(pattern -> antPathMatcher.match(pattern, path))
从ServerWebExchange类中获取到uri
public Mono

前端通过webpack打包发布的,可以从其中找到app.js获取大量接口
加群联系作者vx:xiaoda0423
仓库地址:https://github.com/webVueBlog/JavaGuideInterview
